The four things, and what each one is for
1. A cleaner
The step everyone skips, and the one that decides whether the next step helps or hurts. Conditioning a dirty bag drives the dirt into the hide and seals it there, which is why bags sometimes look worse after being “cared for.” A dedicated leather cleaner lifts body oils, dust and grime without stripping the finish, which is exactly what household soap does do.
Twice a year for a bag in regular use, and before every conditioning. The method — and what to do about specific stains — is in how to clean a leather bag, and the wider shortlist is on our leather cleaner roundup.
2. A conditioner
Leather is a fibrous material held supple by oils, and those oils leave over time through handling, heat and water. A conditioner replaces them. A dry hide is what cracks, and cracking is the one form of leather damage that cannot be undone.
Thinly, twice a year, and on a bag that is genuinely clean. More is not better — over-conditioning leaves a tacky surface that attracts dirt, and conservation guidance is consistent that the risk of over-treating leather is real. The full routine is in how to condition a leather bag, and the alternatives are compared on our conditioner roundup.
3. A water and stain repellent
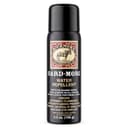
The optional one, and the one with the most dishonest marketing around it. A repellent makes water bead and buys you time to wipe it off. It does not make leather waterproof, nothing does, and any product claiming otherwise is describing a coating rather than a hide.
Worth owning if your bag goes outdoors regularly or if you own suede, which is far more vulnerable. Spot-test on the base first — some repellents darken untreated full-grain. What these products genuinely do is set out in our protector spray roundup and in how to waterproof a leather bag.
4. A cloth — two, actually
The cheapest item on the list and the one people improvise worst. You want two soft, lint-free cloths: one for applying, one for buffing. A microfibre cloth is ideal. A kitchen towel is not — paper fibres are abrasive on a finished surface, and a colored cloth can transfer dye onto pale leather.
We do not link a cloth here, because a pack of microfibre cloths costs almost nothing and there is nothing to compare. Two of the kits below include an applicator, which covers half of it.
What you do not need
This is the more useful half of the page, because the products below are among the most commonly recommended for leather and among the most commonly wrong for a handbag.
Mink oil. Excellent on work boots, wrong on most handbags. It softens and darkens significantly and permanently, which is what you want on a stiff boot and not what you want on a structured bag. We keep it in the registry and we say the same thing on our conditioner versus mink oil comparison.
Saddle soap. A cleaning soap designed for thick, undyed saddlery leather. On a finished handbag it can strip the finish and leave a dull patch. It is a real product with a real job, and that job is not your bag.
Anything sold for car interiors. Automotive leather is heavily coated pigmented hide, so car products are formulated to clean a plastic-like surface rather than feed a hide. They will not usually damage a bag; they mostly will not do anything useful either.
A separate product for every problem.Ink removers, color restorers, edge dressings and leather “food” are for repair jobs and for specific leathers. Buy them when you have the problem, not in advance — our repair kit roundup covers the ones worth owning once the damage exists, and our troubleshooting page covers what each symptom actually means first.
The routine, in full
Twice a year, about fifteen minutes, in this order. Doing it out of order is worse than not doing it.
- Empty the bag and brush out the interior. Grit inside a bag abrades the lining and works into seams.
- Wipe the exterior with a dry cloth. Loose dust first, so you are not grinding it in with the cleaner.
- Clean, in small sections, with a barely damp cloth. Cleaner on the cloth, never poured on the bag. Let it dry fully.
- Condition thinly, then buff.A small amount on the applicator, worked in evenly, then buffed with the second cloth after it has absorbed. Straps and the back panel first — those flex most and take sweat.
- Repellent last, if you are using one, on a fully dry bag, spot-tested on the base.
Between those sessions, the whole maintenance job is: do not store it in plastic, do not leave it packed and damp, and do not hang it loaded by one strap. Storage is where more bags are quietly ruined than anywhere else, and our storage guide is the five-minute version.
Suede is a different kit entirely
If any of your bags is suede or nubuck, nothing on this page belongs on it. A napped surface wants a rubber eraser and a brush, not a cream, and a conditioner will mat the nap permanently. That is a separate kit and a separate page: suede and nubuck care. The one product here that crosses over is the repellent, which names both surfaces on its own label.
Which to buy
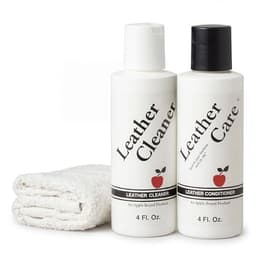
The Apple Brand kit is the answer for most people. It is a matched cleaner and conditioner in one purchase, aimed squarely at finished handbag leather rather than boots or upholstery, and it removes the only genuinely fiddly decision in leather care — whether your cleaner and your conditioner are compatible.
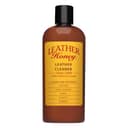
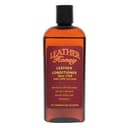
Buy the Leather Honey pair instead if you prefer larger bottles and you have several bags. The cleaner is the one we recommend most on this site, and the conditioner is covered at length in our Leather Honey review — including the darkening that makes it the wrong choice for pale leather.
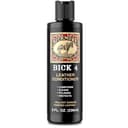
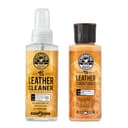
Buy the Bick 4 if your bag is light-colored or you want one bottle that cleans and conditions in a single step without darkening. Buy the Gard-More repellent if the bag goes outdoors, or if you own suede as well and want one bottle rather than two. And buy the Chemical Guys travel kit if what you want is a small set to keep in a drawer for spot-cleaning rather than a full twice-yearly routine.