1. Plated or solid? Four tells before you touch anything
There is no certificate in the box, and listings almost never say. But the evidence is usually sitting on the bag:
- Look for two colors on one fitting. A gold-tone ring with pale silvery patches at the high points is the single most reliable sign of plating: the gold layer has worn through to the nickel or steel beneath. If you can see that anywhere on the bag, every fitting on it is plated.
- Try a magnet. Brass and copper are not magnetic; steel and most zinc-alloy castings behave differently. A fitting that grabs a fridge magnet is not solid brass, whatever color it is.
- Weigh it in your hand. Solid brass fittings feel dense and slightly cold. A hollow, light D-ring that rings rather than thuds is a casting with a finish on it.
- Consider what you paid. Solid brass hardware is a genuine cost line on a bag, which is why the makers that use it say so in the listing. Silence means plated. Our hardware buying guide covers what to look for before you buy, which is a different question from what to do with what you already own.
When the evidence is mixed, assume plated. The cost of being wrong in that direction is a fitting that stays slightly dull. The cost of being wrong in the other direction is permanent.
2. The cleaning ladder, mildest first
Conservation guidance for brass and copper is explicit that cleaning should escalate one rung at a time, and that where the correct appearance is in any doubt “it is safest to clean without polishing.” Translated to a handbag, the ladder looks like this.
Rung one: a dry, soft cloth.Most “tarnish” on a bag that lives indoors is a film of skin oil, hand cream and dust sitting on the metal. It comes off with nothing but a microfiber cloth and thirty seconds of patience, and you should always try this before anything else, because it is free and it cannot do damage.
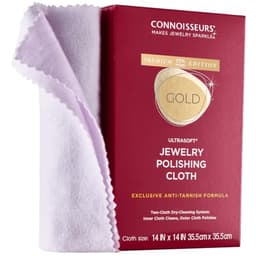
Rung two: a treated polishing cloth, used dry. This is the rung most bag hardware should stop on. An impregnated cloth carries a mild cleaning agent in the fabric, so it lifts the film that plain microfiber cannot without you putting a liquid on a fitting that is riveted into leather. Light pressure, few passes, and stop as soon as it looks even. If a plated finish is going to survive a cleaning, it survives here.
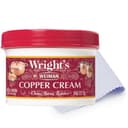
Rung three — solid metal only: a cream cleaner.If you have established the fitting is solid brass or copper and a cloth has not touched it, a dedicated copper-and-brass cream is the next step. Put it on a cotton bud rather than a cloth, work the fitting and nothing else, and wipe it off thoroughly. Conservation guidance adds two warnings worth repeating: automotive and stainless-steel products “often contain very hard particles which can scratch the softer alloys of copper,” and many metal polishes contain ammonia, “which can dissolve copper in some conditions.” A general-purpose metal polish from the garage is the wrong bottle.
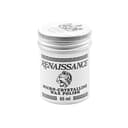
Rung four: protect it so you do not repeat rung three.Bare cleaned metal starts re-tarnishing immediately, because tarnish is simply the metal reacting with moisture and the air. The conservation answer is a thin micro-crystalline wax coat, applied sparingly and buffed back, which the same guidance says “will provide some protection against both the environment and handling” and reduces how often polishing is needed. A trace does a whole bag.
There is no rung five. If a treated cloth, and a cream on solid metal, have not fixed the look, the finish itself is gone and no product puts plating back. That is a re-plating job, it is specialist work, and on most bags it costs more than the bag.
3. Cleaning metal that is set into leather
Every technique above assumes the fitting is in your hand. On a bag it is stitched, riveted or sewn into hide that will absorb anything you spill, so the method matters as much as the product.
- Shield the leather. A piece of card or a strip of low-tack tape slid behind a buckle takes twenty seconds and removes the entire risk.
- Use the smallest applicator that will do the job. A cotton bud holds a controllable amount of cream. A cloth loaded with product does not.
- Work dry wherever possible. Water is the thing that leaves a permanent ring on vegetable-tanned and unfinished hide, and the gap around a rivet is exactly where it collects. If a bag does get wet while you are working, our guide on what to do when a leather bag gets wet covers the first hour, which is the hour that matters.
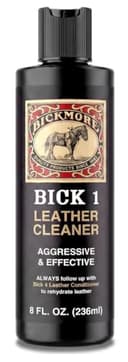
- Clean the leather afterwards, not before. The grime ring that builds up around a fitting is leather dirt, not metal dirt, and a proper leather cleaner takes it off. Our cleaning guide runs the full routine; the short version is to clean the panel, not the spot, so you do not end up with a clean halo around every ring.
4. The four things that actually break
Dullness is not a failure. These are, and they are not equally fixable.
A zipper that sticks, jumps or will not close. The most common hardware fault on any bag and the one most often misdiagnosed as broken. The usual cause is grit in the teeth or a slider that has spread, not a failed zip, and most of the fixes cost nothing. We give it its own page: leather bag zipper repair, including the one thing never to do, which is oil it.
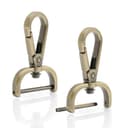
A snapped, bent or seized clip on a detachable strap.This is the home repair of the four. A swivel snap hook with a screw bar replaces the clip without sewing: unscrew the bar, slide the folded strap end off, fit the new clasp, screw it back. Buy a pair rather than one, so both ends of the strap match afterwards, and measure the strap end first — 1 inch, 3/4 inch and 1.25 inch are all common and they are not interchangeable.
A rivet that spins, or an anchor pulling out of the leather. Not a DIY repair, and the reason is load. The rivet is not decoration; it is the structural connection between a strap and a bag, and a replacement set badly fails suddenly with your laptop inside. Our strap and handle repair page explains when a cobbler is the right call and what to ask them for. If the hide around the anchor has torn rather than the stitching, the honest answer may be that the bag is done.
A turnlock, magnetic snap or clasp that no longer holds. Half repairable. A magnetic snap that has weakened can usually be replaced by a leather repairer, because it is set through the panel the same way the original was. A cast turnlock that has sheared is a part you almost certainly cannot source, and a matching replacement rarely exists. This is the failure most likely to retire a bag that is otherwise fine, which is a good argument for preferring simple closures when you buy.
5. Why hardware tarnishes, and how to slow it down
Tarnish is a surface reaction with moisture and the air, accelerated by anything acidic or salty that lands on the metal. On a bag that means two culprits, both of them yours.
The first is skin. Hands deposit oils and salts onto exactly the fittings you touch most — the zipper pull, the clasp, the buckle you adjust — which is why those three go first while the feet on the base stay bright. The second is sweat, which is mostly a salt problem rather than a water problem; the same mechanism that leaves a pale crust on a strap panel also sits on the metal next to it. We go through that at length in our guide to leather bags and sweat.
Three habits do most of the preventive work:
- Wipe the fittings when you wipe the bag. Ten seconds with a dry cloth after a hot day removes the deposit before it becomes a stain on the metal.
- Never put a damp bag away. A closed cupboard, a damp bag and metal fittings is the recipe for the worst tarnish a bag will ever get. Our storage guide covers airflow, dust bags and what not to use.
- Wax the hardware once, after you clean it. The barrier is the only thing on this page that stops the cycle rather than reversing it.
6. The home remedies, honestly assessed
Toothpaste, baking soda paste, ketchup and lemon-and-salt all appear in search results for tarnished hardware, and all four work by the same two mechanisms: mild abrasion and mild acid. On solid metal they do something. On the plated fittings of a handbag they do the one thing you are trying to avoid, and the acid versions also creep into the gap around a rivet where you cannot rinse them out. Conservation guidance warns against commercial tarnish inhibitors for a subtler version of the same reason — they can leave a film that makes later treatment harder. The kitchen cupboard is not a shortcut here.
The one home remedy that is genuinely fine: a dry soft toothbrush for the grit in a zipper or the dust in a buckle’s corners. No paste on it.
What this page cannot do
We have not tested these products on plated bag hardware, and we do not claim to have. What we have done is match the task to the guidance that exists: conservation bodies publish detailed instructions for cleaning, polishing and waxing brass and copper, and the ladder above is theirs, adapted to a fitting that happens to be attached to a bag. The products are the closest currently-available versions of each rung, and the honest limit of every one of them is the same — they clean a finish, and none of them replaces one.
If your bag’s problems are not metal ones, the leather bag troubleshooting index lists every other mark and fault with the fix for each — including the one that panics people most, which is ink on the leather, where the same discipline applies: test somewhere hidden, escalate once, and know where you are going to stop. The care starter kit is the shortest product list that keeps a bag out of all of them.