Steps 1 to 3: the free fixes
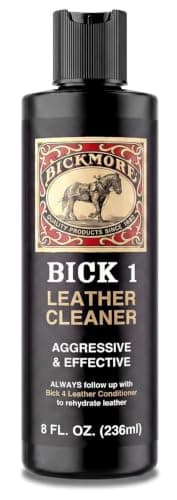
Clean it dry first.Open the zip as far as it will comfortably go and work along both rows of teeth with a dry, stiff-bristled brush — an old toothbrush is ideal. You are removing grit and compacted lint, and a surprising amount comes out. Then wipe the leather on each side of the tape with a barely damp cloth and a leather cleaner; that strip collects hand oils every time the bag is opened, and the resulting film is sticky enough on its own to make a slider feel broken.
Check for something caught. Hold the bag up to a light and look along the closed section. A thread from the lining, a care label, or the edge of a fabric pocket pulled into the teeth will stop a slider dead and feels exactly like a mechanical fault. Free it by opening the zip backwards— pulling the slider the way it came — rather than forcing it forwards.
Lubricate dry, never with oil.This is the part people get wrong and it is worth stating plainly: do not put leather conditioner, mink oil, olive oil, petroleum jelly or any other grease on a zipper. Oil on a zip does three bad things — it attracts and holds the grit that was the problem in the first place, it migrates into the leather on either side and leaves a dark stain that will not come out, and it does not even lubricate metal teeth particularly well. Use a dry lubricant instead: rub a graphite pencil along the teeth, or run a block of paraffin wax or beeswax along them and work the slider back and forth. We do not sell either, and we are not going to invent a product recommendation to fill the gap — a pencil from a drawer is the correct answer.
Step 4: the slider that no longer closes the teeth
If the zip closes behind the slider and then pops open again a second later, the zip is fine and the slider is worn. A slider is a wedge with a narrow channel; thousands of cycles widen that channel until it no longer forces the teeth fully together. The teeth then disengage under tension and you get the classic split zipper.
The home fix is to pinch the slider very slightly narrower with flat-nosed pliers, a tiny amount at a time, testing after each squeeze, and working from the closed end so you can still get the slider off the teeth if you overdo it. Press too hard and you will crack a zinc-alloy slider or make it so tight it jams, so think in fractions of a millimetre. This buys months on a bag and sometimes years, and it costs nothing.
Steps 5 and 6: when it needs a repairer
Two jobs are worth paying for, and the difference between them is a large difference in price.
- A new slider on the existing tape.If the teeth are all present and the tape is sound, a repairer can take the stop off one end, slide a new slider on and refit the stop. No stitching is disturbed, nothing touches the leather, and it is the cheapest repair in this whole category. Ask for this explicitly — it is easy for a quote to default to replacing the whole zip.
- A whole new zip. Needed when teeth are missing, bent or pulled off the tape, or when the tape itself has torn. This means unpicking the seam, fitting a new zip and re-stitching through the original holes, which is real work on a leather bag and sometimes requires taking a lining out. Worth it on a bag with a sound body; rarely worth it on a bag whose corners and handles are also gone, which our corner and edge wear page and strap and handle page both cover.
A third, smaller job you can do yourself: if the pull tabhas come off but the slider body is intact, almost anything that fits through the eye will work — a leather lace, a split ring, a cord. And if a leather pull tab has delaminated or a strip of zip tape has lifted away from the leather it was glued to, a water-based leather cement is the right product, applied thinly and clamped while it sets. Keep adhesive off the teeth entirely.
How to stop it happening again
Three habits, all of them about the geometry rather than the hardware. Do not overfill the bag— the single biggest cause of zip failure on a tote is a load that pushes the two sides of the tape apart while the slider is trying to close them. Close the zip before you set the bag down or pick it up by the handles, so the top edge keeps its shape rather than hinging open on the slider. Brush the teeth out when you clean the bag, which is the thirty-second version of step one done before there is a problem. Our cleaning guide has the full routine, and our starter kit is the short list of products that covers it.
And for the next bag: the zip is one of the few components you can assess before buying. Look for a branded zip, a slider that sits flat rather than proud, and a tape sewn into a reinforced seam rather than glued to a single layer. Our hardware guide covers what to check — and once a zip is working again but the slider and the rings around it look dull, our page on cleaning and repairing bag hardware explains why a metal polish is the wrong answer on a plated finish. The bags in our zip-top tote roundup are the ones where the closure is the point of the bag rather than an afterthought.