1. The water-drop test — do this before you buy anything
Put a single drop of water on a hidden part of the bag: the base, the underside of a flap, the inside of a gusset.
If it beads and sits there, the leather is sealed or pigmented. The ink is mostly on the coating, not in the hide, and a cleaner or a dedicated ink remover has a real chance. Wipe the drop off and get on with it.
If it soaks in and darkens the leather, you have an absorbent finish — aniline, vegetable-tanned, waxed or distressed hide. Ink went in the same way the water just did. Treat anything you do from here as damage limitation rather than removal, and keep every attempt smaller and gentler than you think it needs to be. Our guide to leather types explains why the finishes behave so differently, and the same test appears on our scratch-removal page, where it decides between a balm and a paint.
One more thing the test tells you: if the drop soaks in, the bag is also the kind that develops a patina, which means a faint shadow left behind after treatment will blend over the following year in a way it never would on a sealed bag. That is not nothing.
2. The first ten minutes on a fresh mark
Four rules, in order of how much damage breaking them does.
- Blot. Never rub. A clean dry cloth, pressed straight down and lifted straight off, takes up the ink that has not soaked in yet. Rubbing does two bad things at once: it spreads the dye sideways and it grinds it into the grain.
- Do not wet it. Water does not dissolve most ballpoint ink, and on an absorbent hide it carries the dye further in while leaving its own ring. If the bag has already got wet, our page on what to do when a leather bag gets wet covers the drying order.
- Work from the outside of the mark inward. Starting in the middle pushes ink outward and makes the stain bigger than the accident was.
- Resist the alcohol. This is the one that costs people their bags, and it has its own section below.
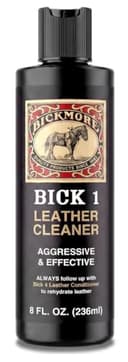
If blotting has taken the worst of it and the leather is sealed, a gentle leather cleaner on a cloth — applied to the cloth, never poured on the bag — is a reasonable next step while the mark is still fresh. Work a small area, change to a clean part of the cloth constantly so you are not re-depositing what you just lifted, and stop the moment it stops improving.
3. Why alcohol, hairspray and Magic Erasers make it worse
All three appear near the top of every search result for this problem, and all three work on the same principle: dissolve or abrade the top layer. The reason they look like they work in a video and fail on your bag is that they do not distinguish between the ink and the finish.
Rubbing alcohol and hairspray(hairspray’s active ingredient here is the alcohol) dissolve the ink, which means the ink is now a liquid again — and a liquid on leather goes two directions: outward into a halo, and downward into the hide. They also strip the finish they touch, leaving a dull, slightly rough patch whose edge you will see for the rest of the bag’s life, and on an absorbent leather they lift the natural oils and leave the spot stiff.
A melamine foam eraseris a micro-abrasive. It is sandpaper with a soft reputation, and on a pigmented bag it removes the pigment along with the ink. The giveaway is colored residue on the white foam — that is your finish.
If a mark is severe enough that you are considering these, that is the point to use a product formulated for leather or to stop and get a quote, not the point to escalate to a solvent. Conservation guidance on leather makes the same argument from the other end: over-treatment causes more irreversible damage to leather objects than leaving them alone does.
4. A set-in mark: how to actually attempt it
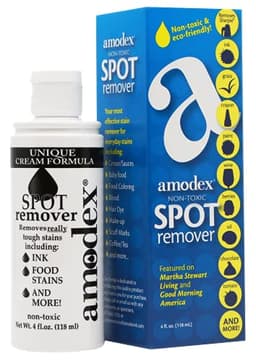
Set-in means the carrier has dried and the dye is in the grain. A dedicated ink remover is the right tool here, and the method matters as much as the bottle.
- Test on a hidden area and wait.Not thirty seconds — long enough for it to dry, so you can see whether it has dulled or lightened the finish. The base of a bag is the standard place.
- Use the smallest applicator that reaches the mark. A cotton bud for a line, a folded corner of cloth for a smear. The treated area should be barely larger than the ink.
- Several light passes, not one heavy one.Let the surface dry between attempts and judge it dry — wet leather always looks darker and more improved than it is.
- Decide your stopping point before you start. The useful rule is two passes with no visible improvement, then stop. Past that you are no longer removing ink; you are removing finish.
Then clean and condition the whole panel rather than the spot. Any ink treatment lifts oils along with the stain, and a treated patch on a used bag comes out looking cleaner than everything around it — which reads as damage even when it is not. Our conditioning guide covers the routine, and the whole-panel rule is the same one we apply to salt marks from sweat.
5. When the ink is gone but a shadow remains
This is the most common real-world outcome on a mark that is more than a few days old, and it is a color problem rather than a cleaning problem. Nothing is dirty any more; pigment is either missing where the treatment lifted it, or a faint tint of dye is still in the grain.
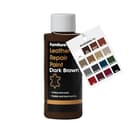
Two products address it and they suit different leathers. A recoloring balm is pigment in a cream or wax carrier that works into the hide, so it suits absorbent, open-finish leather and keeps the hand of the material. A leather repair paint sits on the surface and suits sealed, pigmented bags, where a balm will simply not take. Both want thin layers, both want testing somewhere hidden first, and both are easy to overdo — a patch in slightly the wrong shade or sheen is more visible than the shadow was. The decision tree is the same one on our scratch page, which goes through matching color in more detail.
6. Ink inside the bag — the more likely accident
A pen rarely marks the outside of a bag. It bursts in the bottom of the main compartment, and what it stains is the lining, which on most bags is cotton, polyester or microfiber rather than leather.
That changes the approach. A fabric lining tolerates a stain remover far better than hide does, but the hard part is physical: you cannot soak it, because whatever you put on the lining soaks through to the back of the leather panel and leaves a mark on the side you can see. Turn the lining out as far as it will go, put a folded towel between the lining and the leather so nothing reaches the hide, and treat the fabric with as little liquid as possible. If the lining is suede or leather, treat it as leather — our suede care guide has the method. Our guide to bag linings explains which materials you are likely to be dealing with and why a replaceable lining is worth looking for when you buy.
7. When to pay someone, and when to stop
A professional leather cleaner has two things you do not: solvents matched to specific finishes and the ability to re-finish a panel afterwards. If the bag is worth meaningfully more than the quote, that is the right call before you experiment, not after — a bag that has already been attacked with alcohol is a harder job than a bag with ink on it.
And sometimes the answer is to live with it. A small ink mark on a bag that is already carrying five years of patina is one more thing that happened to it. Our patina guide makes that case properly; the short version is that the owners who enjoy their bags most are the ones who stopped treating every mark as a fault.
8. Not getting ink on it again
Pens leak in bags because they live loose in the main compartment, cap-down, under everything else, and get compressed. Three habits fix it: carry pens capped and clipped to a pocket rather than loose, keep them in a small zip pouch or a dedicated slot, and never let one share the laptop compartment, where it gets pressed flat against a hard edge every time you put the machine away.
If your current bag has nowhere sensible to put a pen, that is a layout problem rather than a discipline problem, and it is worth solving at the next purchase. Our roundup of leather backpacks with lots of pockets ranks bags only on the layouts their listings actually itemize, which is the short way to find one with a dedicated small-items pocket. For the rest of the marks a bag collects, the troubleshooting index lists each one with its fix, and the care starter kit is the shortest set of products that handles most of them.